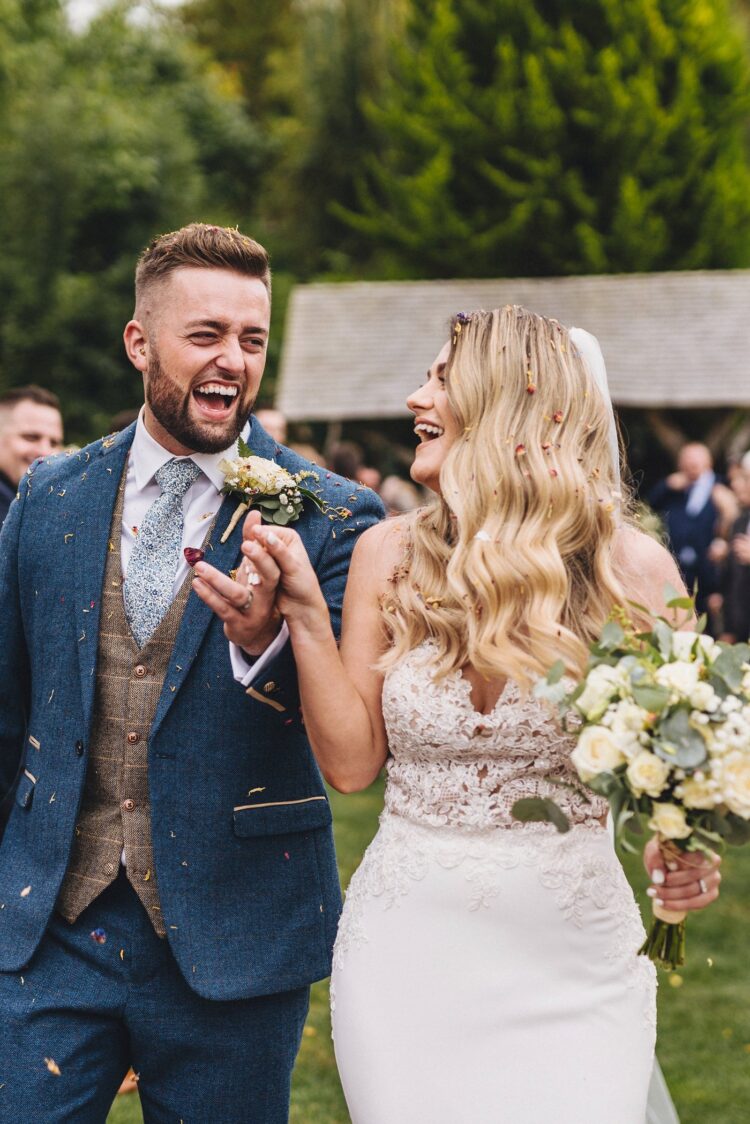
How to get the best confetti photo?
Best confetti photos aren’t about luck – they’re about a tiny bit of planning (and then letting the chaos be brilliant). Confetti is one of the loudest, happiest fun moments of the whole day… and when it’s done well, it looks epic in photos: full tunnel, big reactions, proper movement, everyone cheering like they mean it.
We’re Marta May Photography – also known as The Mays (Marta + Artur). Our DOCU-ART style is all about real moments with a cinematic finish, and we’ve photographed confetti in every kind of UK weather and light. We’re TWIA National Winners (2023) and now TWIA judges, and we’ve photographed confetti moments in every kind of UK light and weather – from bright sunshine to drizzle to full-on “hold my veil” wind. The good news: confetti is 90% planning, 10% chaos… and we love both.
Quick answer (for the best confetti photos):
Choose biodegradable paper circles (or a mix with medium dried petals), hand it out in open baskets (not cones), line guests into a long “confetti tunnel”, and get everyone to throw UP on your count while you walk through slowly holding hands. If you do just these four things, your confetti moment will look fuller, last longer, and feel a lot more fun.
The 2-Minute Confetti Plan (so your photos look FULL)
Confetti only lasts a few seconds – so this is the tiny plan that makes it look epic (and feel properly fun).
- Step 1 – Check the venue rules
Before you buy anything, confirm what’s allowed (some venues only allow biodegradable confetti, or only in certain areas).
- Step 2 – Put confetti in baskets (not cones)
Baskets = bigger handfuls. Cones = polite sprinkling. Bigger handfuls = fuller confetti photos.
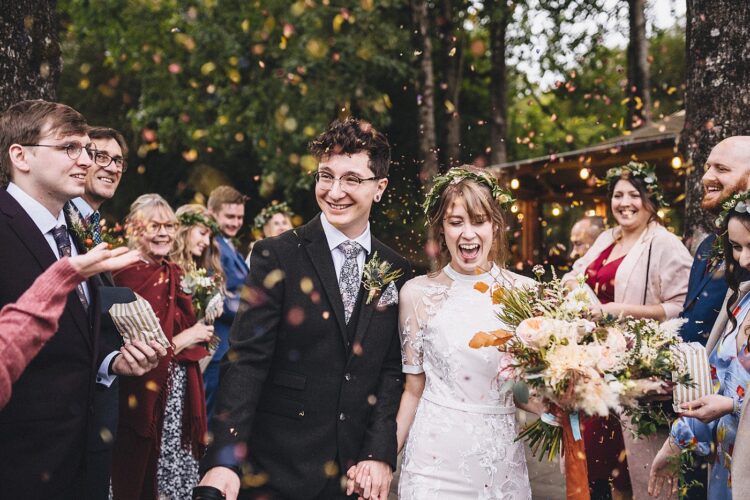
- Step 3 – Build a “confetti tunnel”
Two lines of guests, with a clear walkway in the middle. The longer the tunnel, the more photos (and the more energy).
- Step 4 – Give one clear instruction
We’ll do a quick: “Ready… 3, 2, 1… THROW UP!”
(Up in the air, not at faces. This keeps it flattering and avoids eye-poking chaos.)
- Step 5 – Walk slowly, close together
Hold hands. Stay close. Walk like you’ve got all the time in the world. If you fancy it, stop halfway for a quick kiss – it’s always a winner.
- Step 6 – Keep the confetti going
Ask guests to throw once as you start, then again as you reach them. Two waves of confetti = longer moment = better photos.
Key Facts for Best Confetti Photos:
Best confetti for photos: Biodegradable tissue paper circles (most “float”)
Best way to hand it out: Open baskets (guests grab bigger handfuls)
Best guest instruction: “Throw up, not at faces”
How much to buy (simple rule): Aim for 1–2 handfuls per guest
Petal guide: ~5 litres for 50 guests / 10 litres for 100 guests
TOP RULE: THERE IS NO SUCH THING AS TOO MUCH CONFETTI!
Best confetti for wedding photos (fresh vs dried vs paper… plus bubbles)
If you want best confetti photos, you’re really choosing two things: visibility (can the camera see it?) and float time (does it hang in the air long enough for that epic frame?).
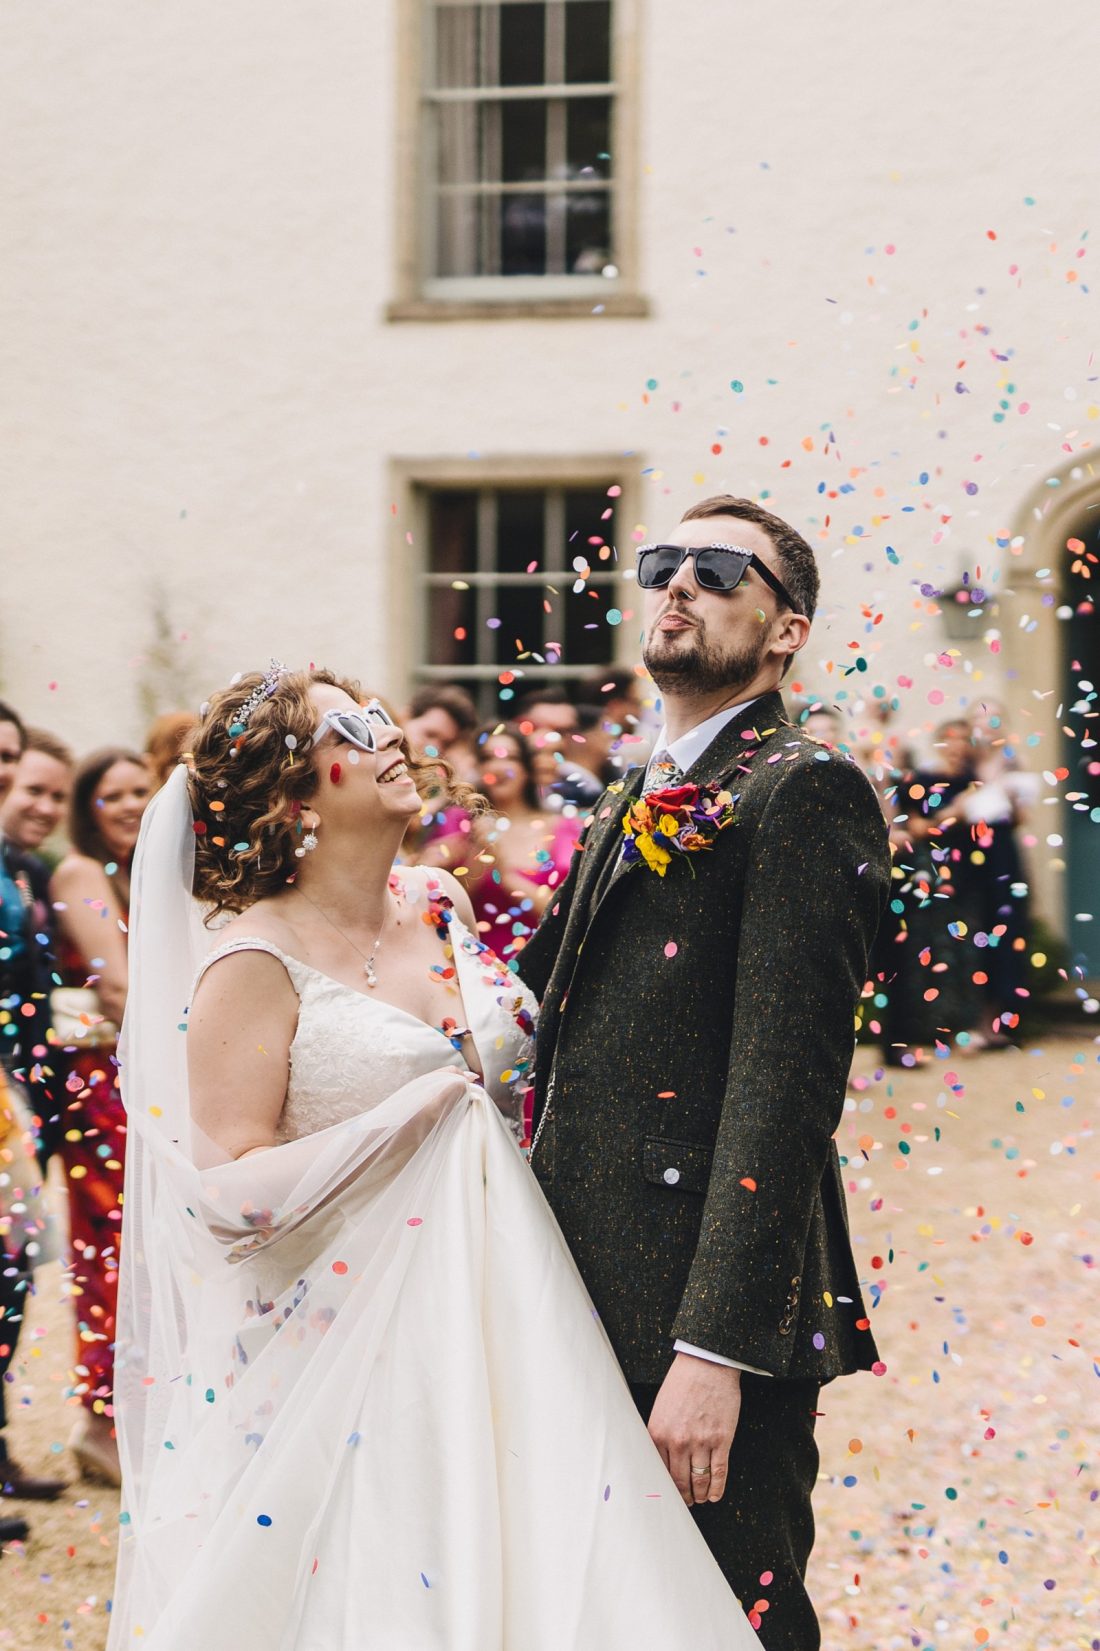
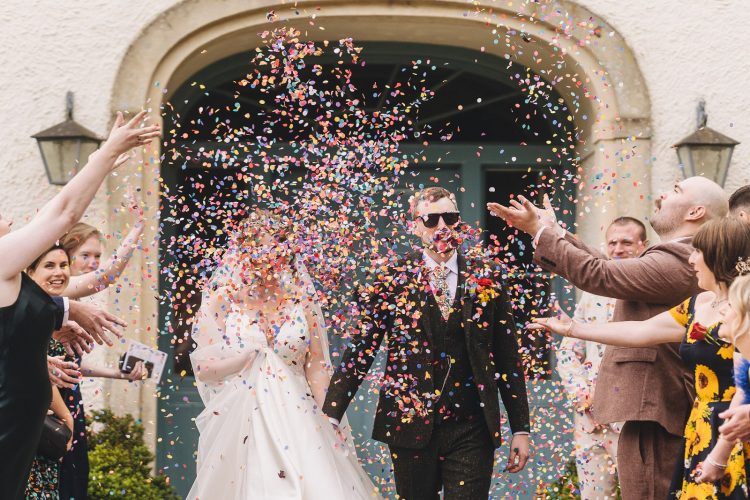
Paper confetti (biodegradable tissue circles) – our top pick
If your venue allows it, biodegradable tissue paper circles/discs are usually the easiest way to get those full, floaty, wow confetti photos. They’re light enough to flutter and stay in the air longer, and they’re big enough to show up clearly in photos.
Best for: big “confetti tunnel” shots, colour impact, maximum drama with minimum effort.
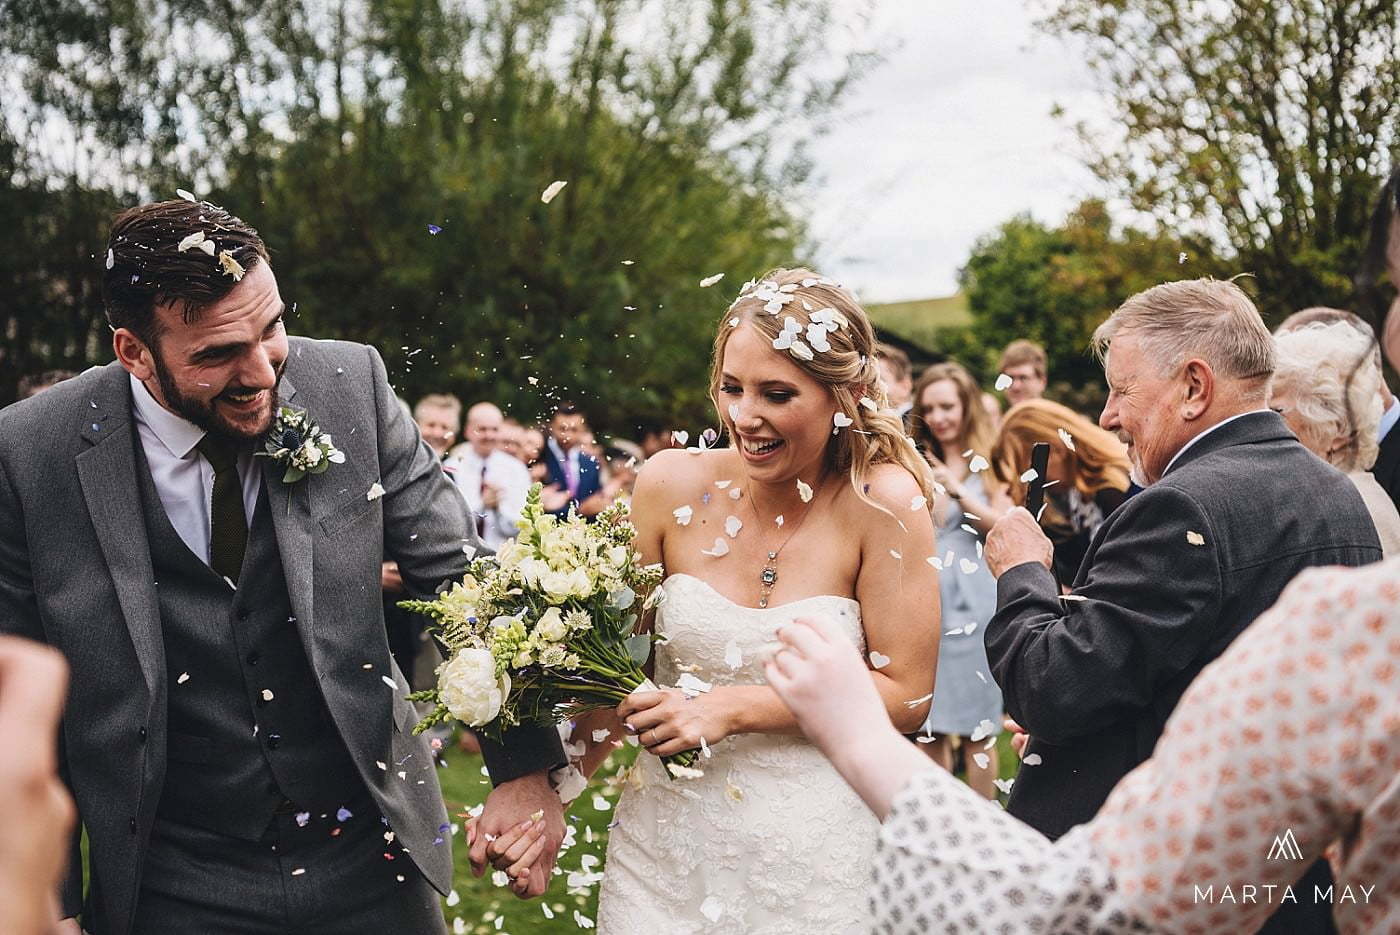
Dried petal confetti – beautiful, but choose the right size
Dried petals can look gorgeous (and many venues love them), but tiny petals can disappear on camera. Go for medium-to-large petals, and if you’re tempted by lavender… just know it can get everywhere.
Best for: venues with strict eco rules, couples who want a softer, natural look.

Fresh petals – romantic and lush, but heavier
Fresh petals look dreamy, but they’re heavier, so the “confetti rain” can be over quicker. Still stunning, just a slightly shorter moment, which is why we keep it simple and fast.
Best for: classic, romantic vibes and venues that only allow petals.

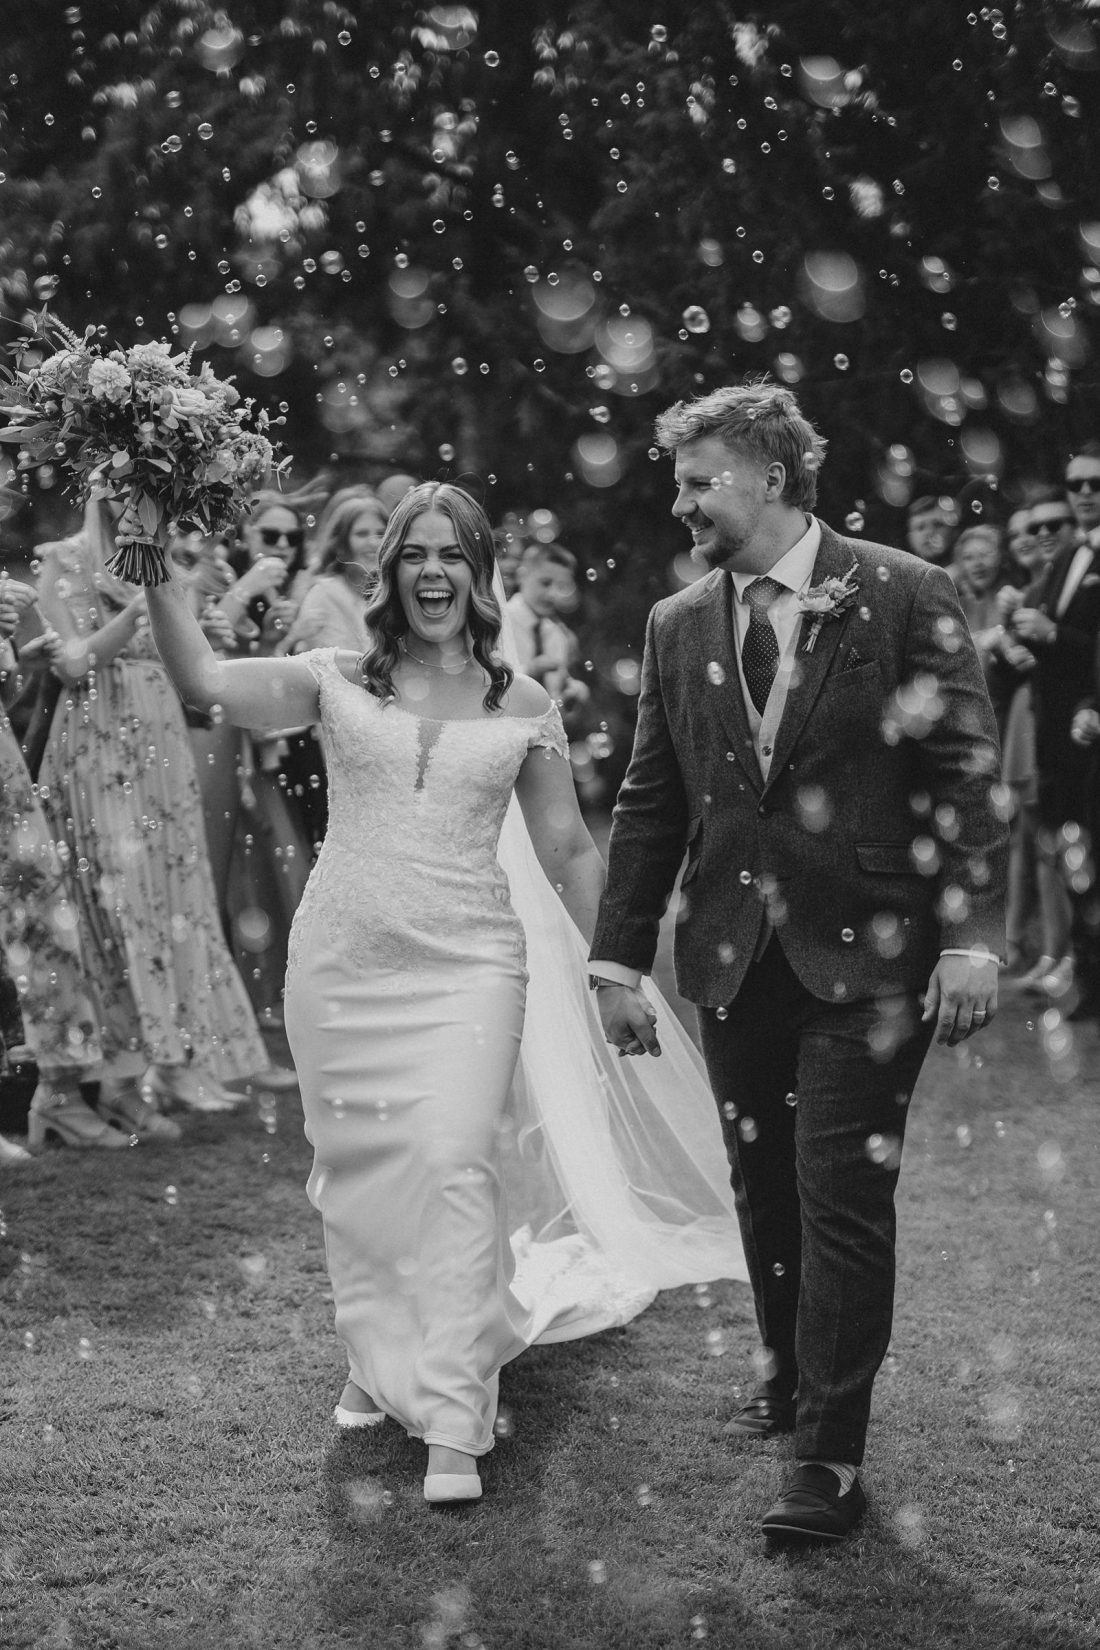
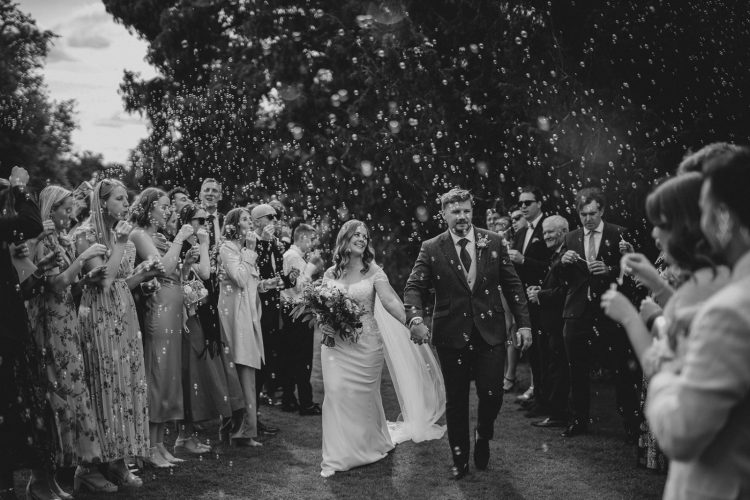
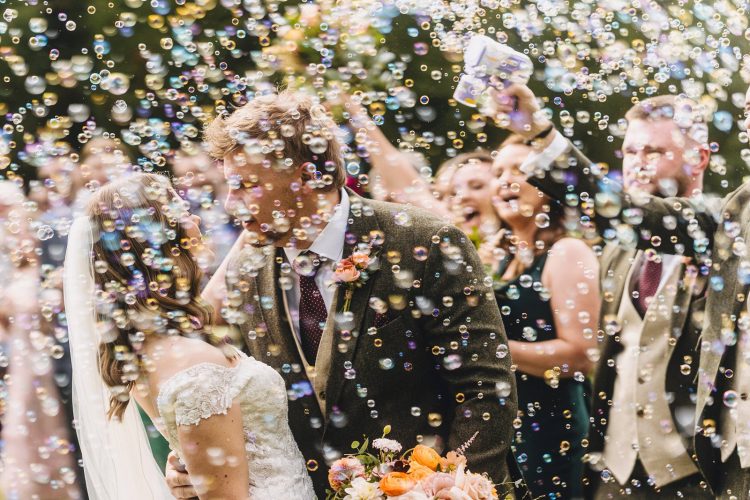
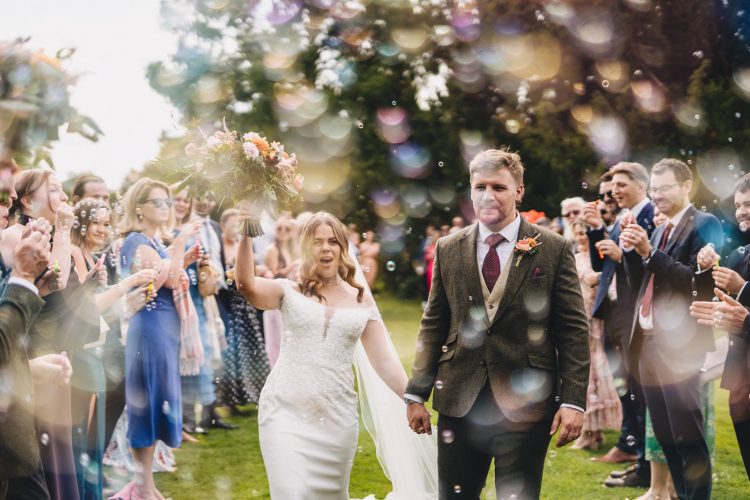
Bubble “confetti” (a magical alternative when paper isn’t allowed)
If your venue restricts confetti, bubbles are a genuinely brilliant swap – especially for outdoor exits and sunny backlight. They’re photogenic, they add movement, and the moment feels fun rather than “we weren’t allowed confetti”. We’ve photographed bubble exits (Birtsmorton Court is a perfect example) and they can look so magical.
Best for: no-confetti venues, kids + guests who love a bit of chaos, golden hour sparkle.
Tiny tip: bubbles photograph best when guests are close enough to create a “bubble cloud”, and when you’ve got light behind you (even just a bright sky).
Other confetti-style options (if you want something different)
If you want the energy without the clean-up:
- Ribbon wands (great for photos, very venue-friendly)
- Dried flower toss / petals in baskets (soft, romantic, eco)
- Sparkler exit (only if your venue allows it and it’s safe)


You’ve also got other options. Confetti cannons can look amazing, bubbles are a brilliant no-mess alternative, and honestly… it’s totally fine to skip confetti altogether if it’s not your thing. If you do go for it, try to avoid plastic or artificial confetti. It’s not great for the environment, and it can be a bit risky too – we’ve heard of guests (and even a bride) getting pieces in their eyes. Biodegradable paper confetti, petals, or bubbles are the safer, kinder choices.
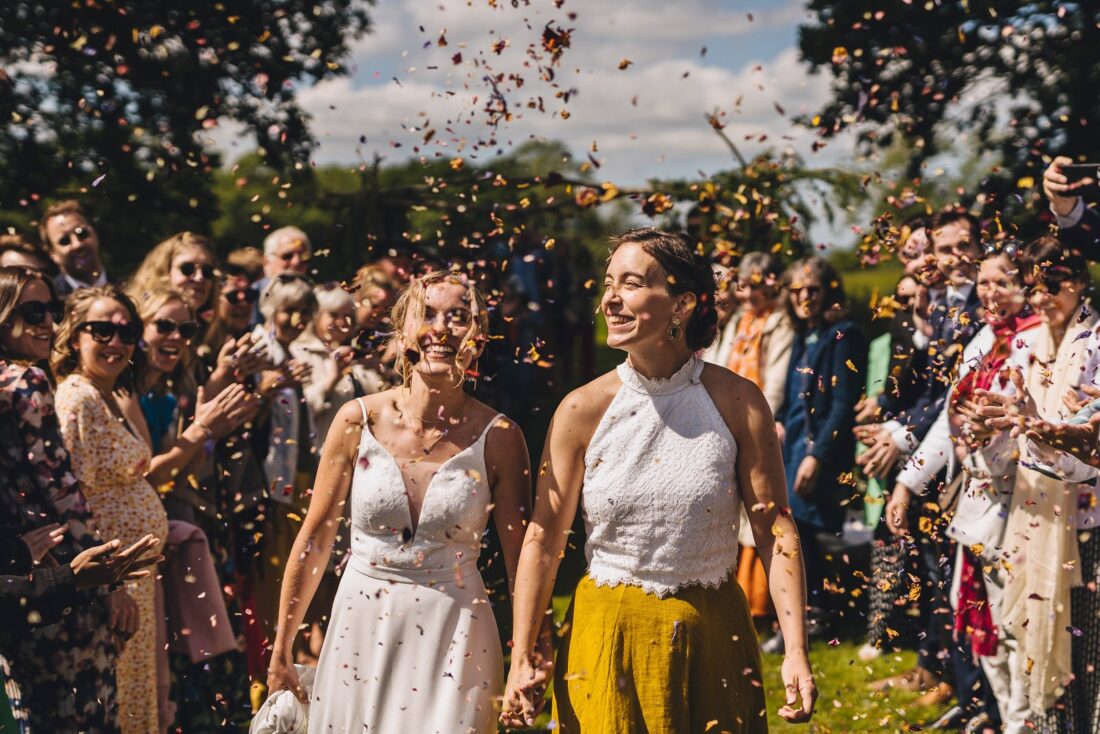
Best confetti photo – our verdict
If you want the best confetti photo, our favourite choice is bright biodegradable paper confetti – especially the tissue paper circles/discs that float and stay visible for longer. For an even richer look, go for a mix of paper confetti + dried petals (it adds texture and colour without losing that “full tunnel” effect).
Dried petals in mixed colours (including white) also photograph beautifully, particularly if the petals are medium-to-large (tiny petals can disappear in photos).
The real secret: quantity (and how it’s handed out)
To get that full, wow confetti moment, you need enough confetti for proper handfuls – not a light sprinkle. As a rough guide, aim for 1–2 good handfuls per guest, and hand it out in baskets so people naturally grab more. Cones often lead to tiny throws, which makes the tunnel look sparse.
PLAN YOUR WEDDING AND GET THE MOST EPIC PHOTOS!
Download The Guide
Top Wedding Planning Tips
A lot of confetti (yes, really)
If you want that proper, full confetti tunnel in your photos, the secret is simple: don’t ration it. Give guests enough to grab a real handful (or two), because a light sprinkle disappears on camera.
Rule of thumb: aim for 1–2 good handfuls per guest.
And if you can, put it in baskets rather than cones – baskets naturally lead to bigger handfuls and bigger throws.
Quick guide (easy maths):
30 guests: aim for ~30–60 handfuls
50 guests: aim for ~50–100 handfuls
100 guests: aim for ~100–200 handfuls
If you’re buying petals by volume, a common guide is:
50 guests: around 5 litres
100 guests: around 10 litres
Bottom line? There’s no such thing as too much confetti… only “not enough to show up in the photos.”

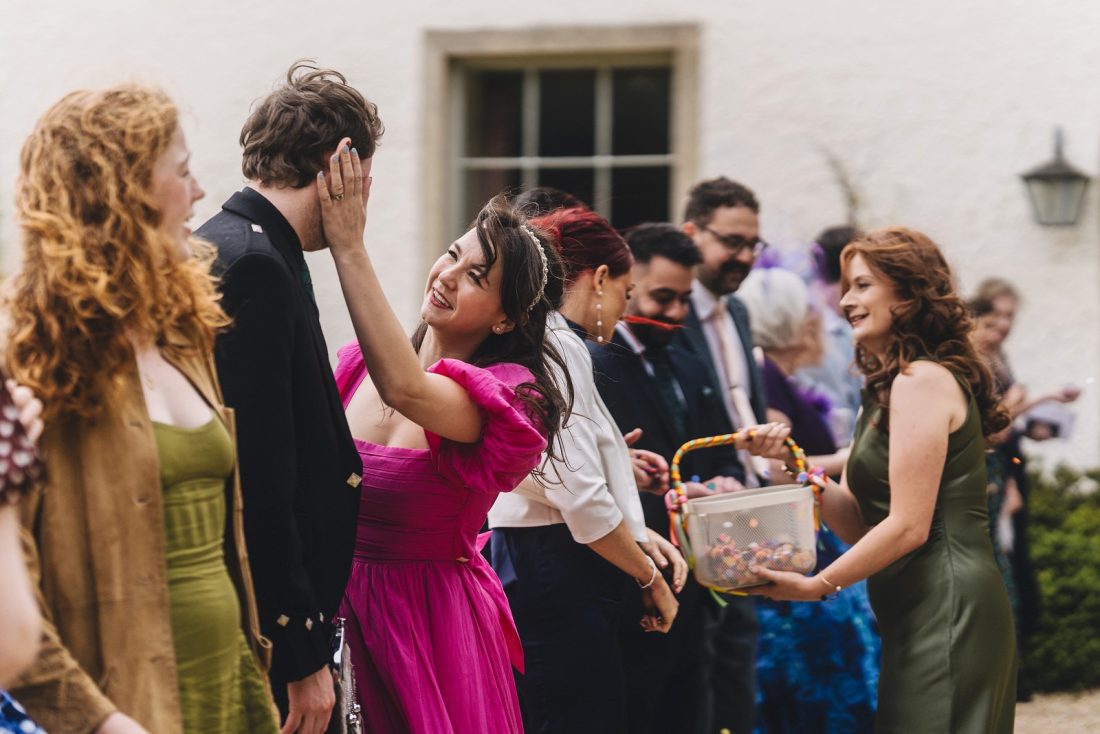
Confetti cones (and why baskets work better)
If you want full, dramatic confetti photos, we recommend baskets over cones. Baskets encourage guests to grab proper handfuls, which means more confetti in the air and a stronger photo.
Ask your bridesmaids and groomsmen to hand the confetti out right before the confetti moment (not earlier in the day, when it gets lost or crushed in pockets). We’ll help you gather everyone and set up the “confetti tunnel” so it’s quick and fun.
Hot day tip: cones can still be useful – guests can use them as a quick fan while they’re waiting (bonus points for avoiding shiny, sweaty foreheads in the photos!).

Trust your wedding photographer
Your photographer will choose the best spot for your confetti moment based on light, background, and space – because those three things make the difference between “nice” and wow. We’ll look for:
- clean backgrounds (so the confetti stands out),
- good light (so faces look bright and flattering),
- and enough room for a proper confetti tunnel (so it lasts more than one second).
Then we’ll organise the timing and give everyone a quick countdown, so your confetti photo looks full, fun, and completely effortless.

General advice (the three things that make or break confetti photos)
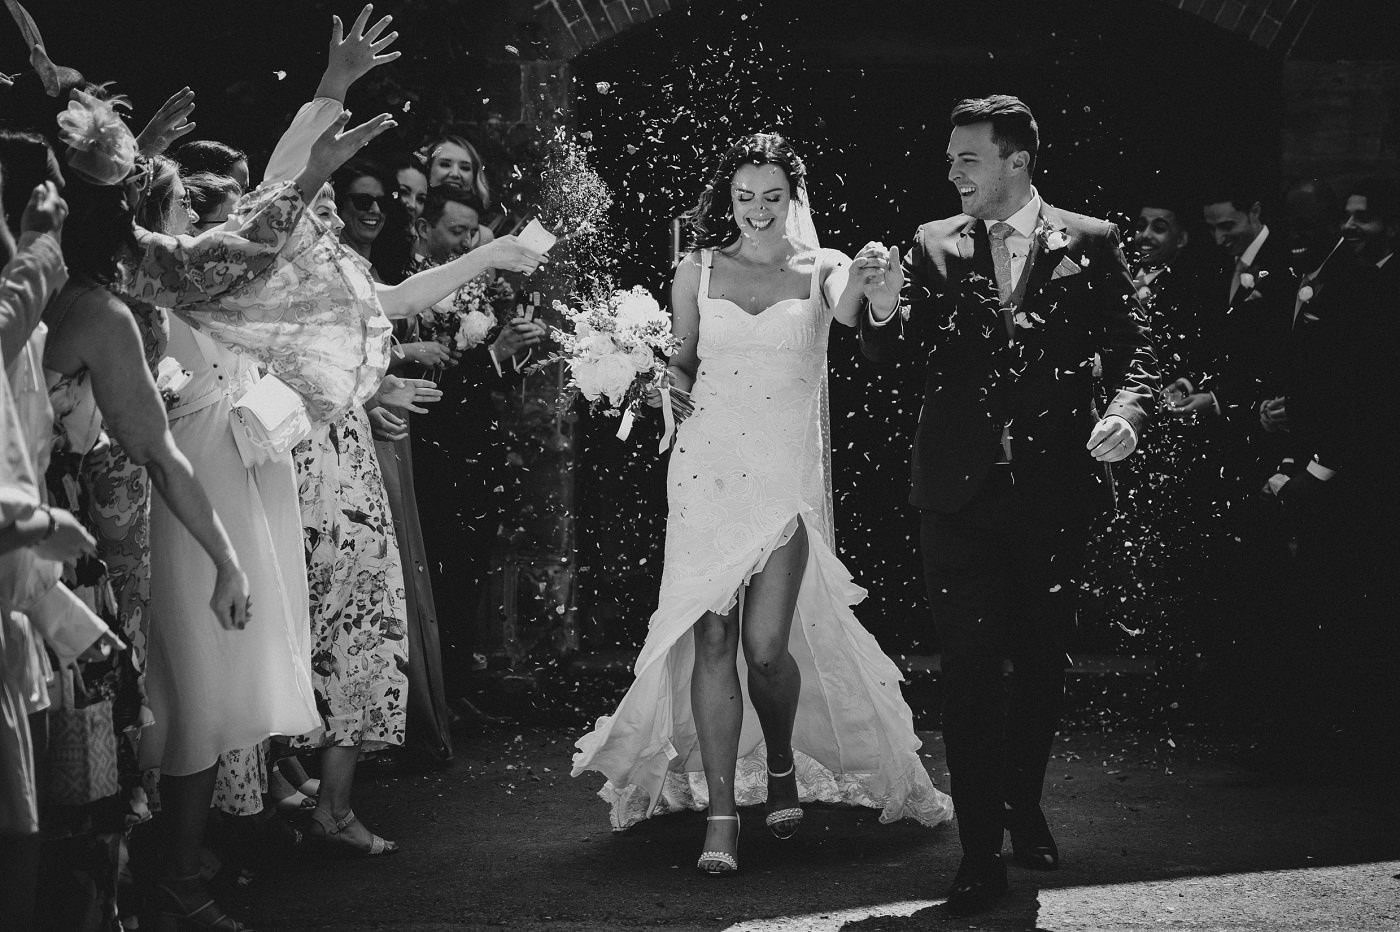
If you want the best confetti photos, there are three things that matter more than anything else: background, contrast, and light. Confetti lasts seconds, so if the setting is wrong, even loads of confetti can look “meh”.
1) Choose a clean background (so the confetti shows up)
Busy backgrounds swallow confetti. Stone walls, dark doorways, trees, or floral arches can look gorgeous in real life… but they can make the confetti almost invisible.
Real example: one of our couples really wanted their lychgate in the background because the florals were stunning, but the confetti blended in and barely showed up in the final photos.
2) Create contrast (dark confetti + dark background = invisible)
If the confetti is dark and the background is dark, it disappears. The same happens with tiny petals – they’re pretty, but they don’t “read” on camera unless the contrast is strong.
Real example: another couple chose navy dried petals and threw them in front of dark stairs. The petals were small and the tones matched the background, so the confetti didn’t pop.
Fix: choose brighter confetti, bigger pieces, or a lighter background. A simple swap can change everything.
3) Avoid harsh, direct sun (squinting ruins the moment)
Even a perfect background can fail if you’re facing into strong sun. You’ll squint, guests will squint, and everyone looks tense – not joyful.
Fix: turn the tunnel slightly, use open shade, or place the moment where the light is softer. We’ll always look for flattering light first.
The easiest option?
Trust your photographer. We’ll pick the spot that gives you clean backgrounds, good contrast, flattering light, and enough space for a proper confetti tunnel – then we’ll organise the timing so it looks full and effortless.
Where should confetti happen (best locations + what to avoid)
If you want the best confetti photos, location matters almost as much as the confetti itself. The goal is simple: space + clean background + flattering light.
The best places for confetti photos
- 1) A long, open walkway (the dream setup)
Think: a straight path outside the ceremony, a driveway, a courtyard walkway, or a garden path. More length = longer tunnel = more frames.
- 2) A doorway / porch / archway (perfect in bad weather)
This is our favourite “Plan B” spot. You get the atmosphere of outside, but you stay sheltered. It also keeps guests comfortable, so they throw more confetti (and smile more).
- 3) A bright, uncluttered background
Light walls, open sky, or simple greenery work brilliantly because the confetti pops. If you’re using pale petals or white paper, a slightly darker background can work too, as long as there’s contrast.
- 4) Somewhere guests can gather naturally
The best confetti moment happens when guests are already in the right place (straight after the ceremony, or during a natural transition). Less herding = more genuine energy.

Places to avoid (or approach carefully)
- 1) Busy backgrounds
Flower arches, lychgates, signs, dark doorways, cluttered entrances… they can be gorgeous, but they often swallow confetti on camera.
- 2) Tight spaces
If the tunnel is too short or narrow, guests can’t throw properly and it becomes a quick “pelt the couple” moment (not the vibe).
- 3) Direct sun in your faces
If you’re squinting, the photos won’t feel relaxed. We’ll angle the tunnel or move it into softer light.
- 4) Dark-on-dark
Dark dried petals against dark stone/stairs can disappear. If you love deep colours, we’ll pair them with a lighter background or mix in brighter confetti for contrast.
The easiest way to get it right
Pick two possible confetti spots with your venue (one outdoors, one sheltered). On the day, we’ll choose the best one based on the light and weather, and we’ll keep it fast, fun, and totally stress-free.

Confetti timing (when to do it for the best photos)
Timing is the sneaky secret behind best confetti photos. Do it at the right moment and it feels effortless. Do it at the wrong moment and it becomes a rushed “quick one!” outside the door.
The best time for confetti (most weddings)
Right after the ceremony, when everyone is already gathered, excited, and ready to cheer. That’s when the energy is naturally high – and it shows in the photos.
A brilliant alternative (if your venue doesn’t allow it after the ceremony)
Do confetti as a re-entrance later in the day – for example:
- as you arrive back at the venue after portraits,
- just before you go in for dinner,
- or after speeches when everyone’s relaxed.
This can actually be even better, because guests are warmed up and more “all in”.
Weather note (because… Britain)
- Light drizzle? Confetti can look amazing (and very cinematic).
- Heavy rain? We’ll move it to a covered spot (doorway/porch/barn entrance) or shift it to a later moment when the weather eases.
Our simple rule
We choose a moment when:
guests are already there + the light is flattering + we have enough space for a tunnel.
Then we give everyone a quick countdown so the confetti hits together (fuller photos, better reactions).
How to tell your guests what to do (so it looks amazing)
Confetti photos look best when guests know one simple thing: throw it up, not at faces. That tiny instruction changes everything.
The perfect 10-second guest briefing
We’ll usually say something like:
“Make two lines please – big handfuls!
When they walk through, throw it UP in the air (not at their faces).
And keep it going as they come past you!”
That’s it. Short, clear, and it creates a proper confetti “rain” instead of a confetti attack.
Two extra tips that make a big difference
1) Ask guests to keep a second handful
Throw once as you start, then again as the couple reach you. Two waves = longer moment = better photos.
2) Encourage cheering and movement
The best confetti photos aren’t just confetti – they’re reactions. Clapping, cheering, laughing… it all adds energy and makes the images feel alive.
What we do as your photographers
We’ll:
- organise the tunnel,
- check the light and background,
- do the quick briefing,
- and give you a countdown so the throw is timed.
You just walk through, hold hands, and enjoy it.
Best confetti photos FAQ:
What if we don’t want confetti at all?
No problem. Confetti is optional – you can swap it for bubbles, ribbon wands, or simply do a big “cheering tunnel” with hugs and high fives. The moment matters more than the confetti.
Is biodegradable confetti always best?
In most venues, yes – it’s the most widely accepted and the kindest choice. Biodegradable paper confetti and petals also tend to photograph beautifully.
Should we do confetti once or twice?
If you want the fullest photos, ask guests to throw twice: once as you enter the tunnel, and again as you reach them.
Can we do confetti later in the day?
Absolutely. A “re-entrance” confetti moment before dinner or after speeches can be even more fun because guests are warmed up.
What’s the biggest mistake couples make?
Too little confetti – or handing it out too early so it gets lost, crushed, or used up before the moment.
Want us to photograph your confetti moment?
We’re Marta May Photography – also known as The Mays (Marta + Artur). We’ll choose the best spot for light and background, organise the tunnel, give guests a quick briefing, and capture a confetti moment that feels big, joyful, and totally you.
If you’d like help planning your timeline (including the perfect confetti slot), GET IN TOUCH and tell us your date + venue.


Hello! Someone in my Myspace group shared this website with us so I came tto take a
look. I’m definitely loving the information. I’m bookmarking and will be tweeting this to my followers!
Outstanding blog and superb style and design.
Thank you for your kind words :) Your work is amazing!
Marta, I am loving this blog plus all of the others. Your information is so helpful and your photos along the way are just magical. I really enjoyed reading this – some great tips plus the blog on ‘group photos’ xx
Hello Marta, this blog popped up on my FB and it hit home that this is so yes. Easy but simple advice for future Bride and Grooms and photographers! I hope you don’t mind for me to share your blog on my FB page? Well done, and we love your confetti shots!
Regards Barry & Liz